01-03基础配置#
[16:04] 01-欢迎来到 OpenGL-Welcome to OpenGL
[22:03] 02-在 C++ 中设置 OpenGL 并创建窗口-Setting up OpenGL and Creating a Window in C++
[18:21] 03-在 C++ 中使用现代 OpenGL-Using Modern OpenGL in C++
[20:06] 04-顶点缓冲区与在 OpenGL 中绘制三角形-Vertex Buffers and Drawing a Triangle in OpenGL
[18:54] 05-OpenGL 中的顶点属性与布局-Vertex Attributes and Layouts in OpenGL
[17:37] 06-OpenGL 中的着色器工作原理-How Shaders Work in OpenGL
[28:21] 07-在 OpenGL 中编写着色器-Writing a Shader in OpenGL
[21:15] 08-我是如何处理 OpenGL 中的着色器的-How I Deal with Shaders in OpenGL
[16:54] 09-OpenGL 中的索引缓冲区-Index Buffers in OpenGL
[23:42] 10-处理 OpenGL 中的错误-Dealing with Errors in OpenGL
[11:27] 11-OpenGL 中的 Uniform 变量-Uniforms in OpenGL
[21:50] 12-OpenGL 中的顶点数组-Vertex Arrays in OpenGL
[26:46] 13-将 OpenGL 抽象为类-Abstracting OpenGL into Classes
[30:07] 14-OpenGL 中的缓冲区布局抽象-Buffer Layout Abstraction in OpenGL
[21:56] 15-OpenGL 中的着色器抽象-Shader Abstraction in OpenGL
[14:43] 16-在 OpenGL 中编写基础渲染器-Writing a Basic Renderer in OpenGL
[31:44] 17-OpenGL 中的纹理-Textures in OpenGL
[12:37] 18-OpenGL 中的混合-Blending in OpenGL
[18:07] 19-OpenGL 中的数学-Maths in OpenGL
[20:10] 20-OpenGL 中的投影矩阵-Projection Matrices in OpenGL
[15:53] 21-OpenGL 中的 MVP 矩阵-Model View Projection Matrices in OpenGL
[14:36] 22-在 OpenGL 中使用 ImGui-ImGui in OpenGL
[12:21] 23-在 OpenGL 中渲染多个物体-Rendering Multiple Objects in OpenGL
[16:52] 24-为 OpenGL 设置测试框架-Setting up a Test Framework for OpenGL
[22:46] 25-在 OpenGL 中创建测试-Creating Tests in OpenGL
[28:13] 26-在 OpenGL 中进行纹理测试-Creating a Texture Test in OpenGL
[11:37] 27-如何让你的 UNIFORMS 更快-How to make your UNIFORMS FASTER in OpenGL
[12:25] 28-批量渲染:简介-Batch Rendering - An Introduction
[09:15] 29-批量渲染:颜色-Batch Rendering - Colors
[15:51] 30-批量渲染:纹理-Batch Rendering - Textures
[23:17] 31-批量渲染:动态几何体-Batch Rendering - Dynamic Geometry01WelcomToOpengl#
- 课程初衷与背景
- 作者介绍了为什么要制作这个系列:市面上很多教程只教“怎么做”,而不教“为什么”。
- 本系列的目标是不仅让你写出代码,还要让你理解 OpenGL 的底层工作原理及其与 GPU 的交互逻辑。
- 什么是 OpenGL?
- 核心定义:OpenGL 本质上是一个规范(Specification)
接口,API,而不是一个具体的库。它规定了函数应该如何命名、参数是什么以及预期的行为。允许我们实际访问我们的GPU,GraphicsProcessingUnit,图形处理单元。OpenGL是其中之一的接口,还有Direct3D,Vulkan,Metal等 - 实现者:具体的实现通常由显卡厂商(NVIDIA, AMD, Intel)编写在驱动程序中。
- 跨平台,Windows、Linux、Mac、Android、IOS
- 状态机(State Machine):初步引入 OpenGL 是一个状态机的概念,你设置好状态(如颜色、缓冲区),然后发出指令进行渲染。
- 核心定义:OpenGL 本质上是一个规范(Specification)
- 现代 OpenGL vs 传统 OpenGL
- Legacy OpenGL (固定管线):简单但不够灵活,很多功能已经废弃(如
glBegin,glEnd)。 - Modern OpenGL (可编程管线):通过 着色器 (Shaders) 控制渲染过程。虽然代码量显著增加,但提供了极大的灵活性和性能优化空间。
- Shader(着色器)是程序,在==GPU==上运行的代码程序
- 本系列将专注于 Modern OpenGL (版本 3.3 及以上)。
- Legacy OpenGL (固定管线):简单但不够灵活,很多功能已经废弃(如
- 学习 OpenGL 的难点与心态
- 强调了学习曲线:初期需要写==大量的“模板代码”(Boilerplate code)==才能在屏幕上画出一个简单的三角形。
- 图形管线 (Graphics Pipeline):解释了数据如何从 CPU 传输到 GPU,并经过顶点处理、光栅化最终变成像素的过程。
- 开发环境与工具链预告
- 虽然是跨平台的,但本系列主要在 Windows 下使用 Visual Studio 演示。
- 提到后续会使用的关键第三方库:GLFW(窗口管理)和 GLEW/GLAD(访问 OpenGL 扩展函数)。
- 总结与后续计划
- 鼓励初学者不要被前几集的复杂配置和概念吓退。
- 下一集将正式进入 C++ 环境配置,动手创建第一个窗口。
02设置Opengl和创建窗口#
主要讲解如何在 Windows 环境下使用 Visual Studio 搭建 OpenGL 开发环境,并编写代码成功弹出一个窗口。这是所有图形编程的起点。
核心库的选择:GLFW
- 解释为什么需要第三方库:OpenGL 本身不负责创建窗口或处理键盘鼠标输入,这些是操作系统的任务。
- 引入 GLFW:一个开源、多平台的库,专门用于处理窗口创建
跨平台和上下文管理。
下载与配置 GLFW
- 演示前往
glfw.org下载二进制文件(Binary)。 - 关键点:Cherno 推荐下载 32位 (Windows pre-compiled binaries),因为这在库兼容性上通常更稳定,尽管你的系统是 64 位的。
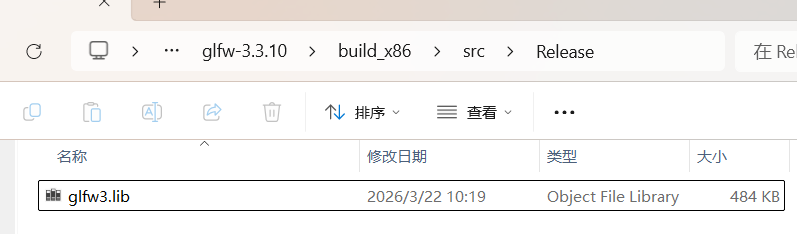
因为我们要让构建的应用在32位上运行。而能在32位系统运行的,也必定能在64位上运行。这里我直接下载源码并编译成了32位的,详见 learnopengl-02创建窗口
- 把链接里的代码
https://www.glfw.org/documentation.html复制进项目
- 演示前往
#include <GLFW/glfw3.h>

int main(void)
{
    GLFWwindow* window;

    /* Initialize the library */
    if (!glfwInit())
        return -1;

    /* Create a windowed mode window and its OpenGL context */
    window = glfwCreateWindow(640, 480, "Hello World", NULL, NULL);
    if (!window)
    {
        glfwTerminate();
        return -1;
    }

    /* Make the window's context current */
    glfwMakeContextCurrent(window);

    /* Loop until the user closes the window */
    while (!glfwWindowShouldClose(window))
    {
        /* Render here */
        glClear(GL_COLOR_BUFFER_BIT);

        /* Swap front and back buffers */
        glfwSwapBuffers(window);

        /* Poll for and process events */
        glfwPollEvents();
    }

    glfwTerminate();
    return 0;
}
Visual Studio 项目设置
- 在工程目录下创建
Dependencies文件夹,在文件夹下又创建一个GLFW,将 GLFW 的头文件(夹)(Include)和库文件(夹)(Lib)放入其中。
#头文件和库目录结构
└─GLFW
├─include
│  └─GLFW
│          glfw3.h
│          glfw3native.h
│
└─lib
        glfw3.lib
配置项目属性:
c/c++-->Additional Include Directories:添加头文件路径。$(SolutionDir)ChernoOpengl\Dependencies\GLFW\include- =
=Linker -> Gerneral -> Additional Library Directories==:添加库文件路径。E:\cppStudyTemp\learnopengl\HelloOpengl\ChernoOpengl\Dependencies\GLFW\lib - Linker -> Input:手动输入
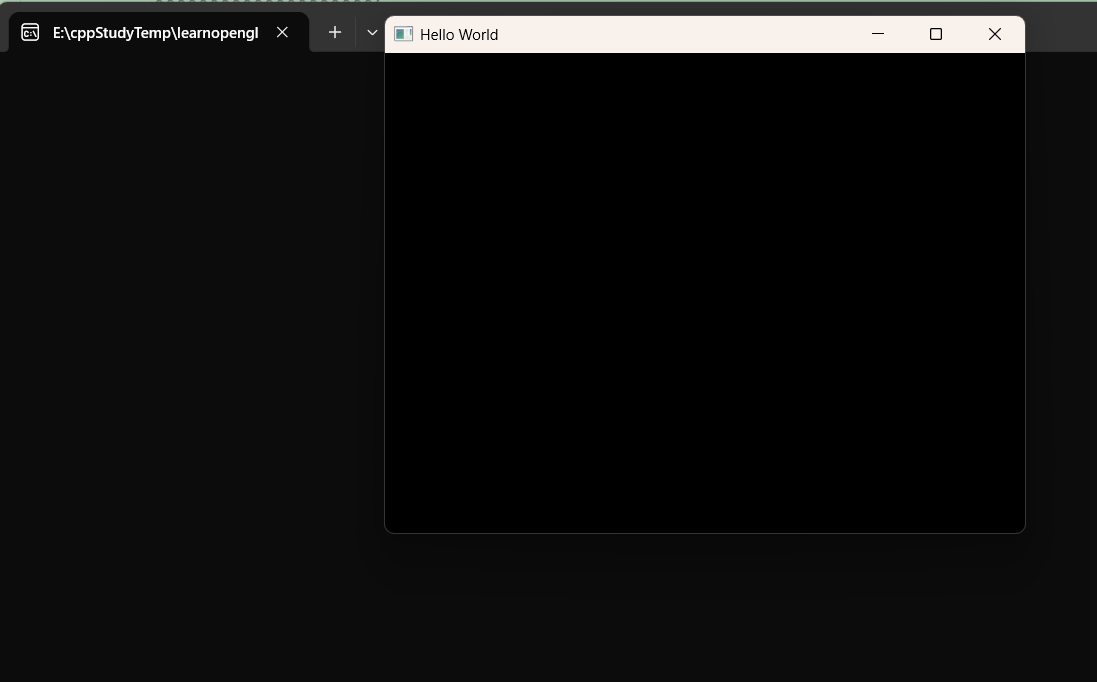
glfw3.lib和opengl32.lib(注意:opengl32.lib是 Windows 系统自带的,不需要额外下载)。 - 运行后出现黑框
注意: 这是在Platform32的配置,所以运行/编译时也要配置成32位的,保持一致

- 在工程目录下创建
静态链接与动态链接的权衡
- 简述了静态库(.lib)和动态库(.dll)的区别。
- 本集中采用静态链接,这样生成的 .exe 文件在运行时不需要寻找额外的 .dll 文件。
编写基础代码
- 包含头文件
#include <GLFW/glfw3.h>。 - 编写初始化代码:
glfwInit()。 - 创建窗口对象:
glfwCreateWindow()。 - 设置当前 OpenGL 上下文:
glfwMakeContextCurrent()。
- 包含头文件
渲染循环 (The Render Loop)
- 引入
while (!glfwWindowShouldClose(window))循环。 - 在循环内调用
glClear(GL_COLOR_BUFFER_BIT)清理屏幕。 - 调用
glfwSwapBuffers(window)进行双缓冲交换(防止画面闪烁)。 - 调用
glfwPollEvents()处理操作系统事件(如关闭窗口、点击等)。
- 引入
调试与运行
- 演示编译并解决常见的链接错误(Linker Errors)。
- 成果展示:成功运行程序,屏幕上出现一个黑色的空白窗口,标志着 OpenGL 环境搭建成功。 核心笔记:
- 不要漏掉
opengl32.lib:即使你使用的是 64 位系统或现代显卡,在 Windows 下链接时依然使用这个名字。 - 双缓冲 (Double Buffering):这是图形学的重要概念,一个缓冲区用于显示,另一个在后台绘制,画好后再交换,保证视觉平滑。
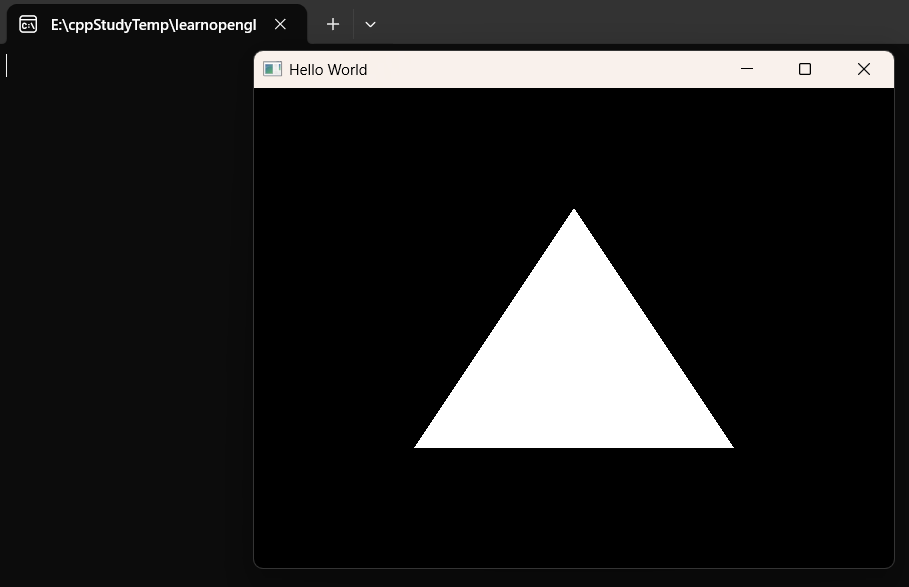
使用传统OpenGL绘制三角形#
//在while中添加代码
while (!glfwWindowShouldClose(window))
{
    /* Render here */
    glClear(GL_COLOR_BUFFER_BIT);

    //===绘制三角形===
    glBegin(GL_TRIANGLES);
    glVertex2f(-0.5f, -0.5f);
    glVertex2f(0.0f, 0.5f);
    glVertex2f(0.5f, -0.5f);
    glEnd();
    //===绘制三角形===

    /* Swap front and back buffers */
    glfwSwapBuffers(window);

    /* Poll for and process events */
    glfwPollEvents();
}
03现代OpenGL#
在前一集搭建好窗口的基础上,引入了 GLEW,并深入探讨了现代 OpenGL 与传统 OpenGL 的本质区别。
引入 GLEW (OpenGL Extension Wrangler Library)
- 痛点:解释为什么只包含
<GL/gl.h>不够。Windows 自带的头文件版本极低(1.1),无法直接调用现代显卡的函数。 - GLEW 的作用:它是一个加载库,负责在运行时动态获取现代 OpenGL 函数的地址。
注意,它并没有实现函数,它只是访问这些函数。这些函数是由显卡驱动实现的,早就在电脑里了 - 配置演示:展示如何下载 GLEW
https://glew.sourceforge.net/include和lib路径添加到 Visual Studio 项目中。 最后,还要添加lib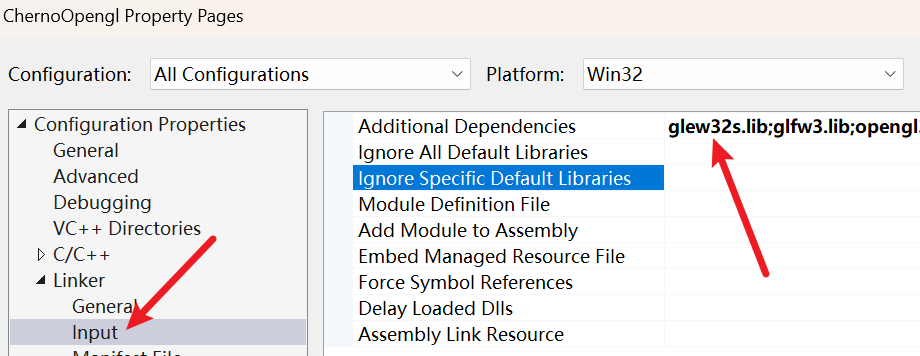
- 痛点:解释为什么只包含
初始化 GLEW 的陷阱
#include <GL/glew.h>必须 在#include <GLFW/glfw3.h>之前,否则会报错- 关于链接错误,需要在属性-
c/c++-Preprocessor中定义GLEW_STATIC
15:51:58:820 1>Main03_01.obj : error LNK2019: unresolved external symbol __imp__glewInit@0 referenced in function _main 这是一个链接错误,接着查看glew.h源码
	  /*
 * GLEW_STATIC is defined for static library.
 * GLEW_BUILD  is defined for building the DLL library.
 */

#ifdef GLEW_STATIC
#  define GLEWAPI extern
#else
#  ifdef GLEW_BUILD
#    define GLEWAPI extern __declspec(dllexport)
#  else
#    define GLEWAPI extern __declspec(dllimport)
#  endif
#endif
如果遇到了链接错误(比如 LNK2019),通常就是因为这里的宏定义(比如 GLEW_STATIC)和实际链接的库文件类型没对上如果非要用动态库的话,除了要设置 glew32.lib(不带s后缀),还要把一起的.dll放到.exe所在目录
我们这里使用的是glew32s.lib,这是静态库,所以需要在宏宇定义那里定义GLEW_STATIC
- 关键顺序:必须先创建 OpenGL 上下文(即调用
glfwMakeContextCurrent),然后才能调用glewInit()。
- 如果顺序反了,程序会崩溃或无法加载函数。
- 演示如何检查
glewInit()的返回值以确保初始化成功。
/* Make the window's context current */
glfwMakeContextCurrent(window);
//先有窗口和上下文,加载器才能工作
if (glewInit() != GLEW_OK)
{
	std::cout << "Error!" << std::endl;
}
传统 OpenGL (Legacy) vs 现代 OpenGL (Modern)
- Legacy (固定管线):使用
glBegin()和glEnd()。虽然简单,但效率极低,因为 CPU 每一帧都要向 GPU 发送大量指令。 - Modern (可编程管线):数据(顶点、颜色等)被打包成 缓冲区 (Buffers) 一次性发送到 GPU 内存。GPU 通过 着色器 (Shaders) 自行决定如何渲染。
- Cherno 的观点:虽然现代 OpenGL 代码量更多,但它是理解 GPU 运作方式的唯一途径。
- Legacy (固定管线):使用
绘制第一个“东西”:现代方式的雏形
- 演示调用
glDrawArrays(GL_TRIANGLES, 0, 3)。 - 解释为什么此时屏幕上还是黑色的:因为我们还没有给 GPU 提供任何顶点数据,也没有编写着色器。
- 演示调用
验证 OpenGL 版本
- 演示使用
glGetString(GL_VERSION)打印当前驱动支持的 OpenGL 版本。 - 这是一个非常实用的调试技巧,确保你的代码运行在预期的硬件环境下。
- 演示使用
总结与展望
- 确认开发环境(GLFW + GLEW)已完全就绪。
- 预告下一集:正式引入 顶点缓冲区 (Vertex Buffers),开始向显卡内存传输真实数据。
核心知识点笔记#
| 概念 | 说明 |
|---|---|
| GLEW | 让你能用上显卡里那些“隐藏”的高级函数(函数加载器)。 |
| Context | 必须先有窗口和上下文,加载器(GLEW/GLAD)才能工作。 |
| GPU Buffer | 现代 OpenGL 的核心,把数据从内存搬到显存,减少CPU 负担。 |
下一步建议: 下一集(04集)会涉及到非常抽象的 glGenBuffers 和 glBindBuffer。你在看视频时,可以重点关注数据是如何从一个普通的 C++ 数组“变”到显存里的。
源代码#
#ifdef LY_EP03
#include <iostream>
#include <GL/glew.h>
#include <GLFW/glfw3.h>

int main(void)
{
	GLFWwindow* window;

	/* Initialize the library */
	if (!glfwInit())
		return -1;

	/* Create a windowed mode window and its OpenGL context */
	window = glfwCreateWindow(640, 480, "Hello World", NULL, NULL);
	if (!window)
	{
		glfwTerminate();
		return -1;
	}

	/* Make the window's context current */
	glfwMakeContextCurrent(window);
	//先有窗口和上下文,加载器才能工作
	if (glewInit() != GLEW_OK)
	{
		std::cout << "Error!" << std::endl;
	}

	//4.6.0 Compatibility Profile Context 23.19.12.02.240618
	std::cout << glGetString(GL_VERSION) << std::endl;

	/* Loop until the user closes the window */
   //在while中添加代码
	while (!glfwWindowShouldClose(window))
	{
		/* Render here */
		glClear(GL_COLOR_BUFFER_BIT);

		//===绘制三角形===
		glBegin(GL_TRIANGLES);
		glVertex2f(-0.5f, -0.5f);
		glVertex2f(0.0f, 0.5f);
		glVertex2f(0.5f, -0.5f);
		glEnd();
		//===绘制三角形===

		/* Swap front and back buffers */
		glfwSwapBuffers(window);

		/* Poll for and process events */
		glfwPollEvents();
	}

	glfwTerminate();
	return 0;
}

#endif